Schematic

Layout
Jan 28, 2000
Copyright (c) 1998, Carnegie Mellon University
All Rights Reserved.
Schematic
Layout
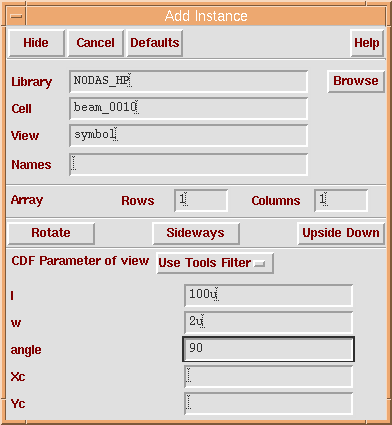
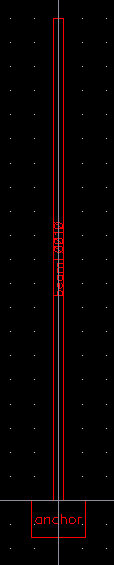
Part I. Presteps
   If you have already done following practices, please jump to Part II.
   1. If you don't know how to start cadence, see Start Cadence
   2. If you don't know how to edit schematics, Read schematic edit help
   to learn how to:
        A. Create a new library
        B. Create a new schematic cell view
        C. Placing an instance in a schematic editing window
        D. Some basic skills in manipulating the symbols
        E. List of required parameters for CMU Mems Utility components.
   3. Create a new library test. Create a new schematic tutorial in
      test library.
Part II. Steps to build schematic 1. Lets start with the beam_0010. Click on the instance icon to add a new instance. Specify Library, Cell, View, and properties as show below. Remember in order to put a vertical beam, you have to click Rotate once. Don't forget to enter in all the properties.
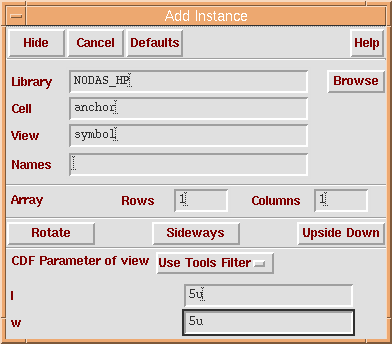
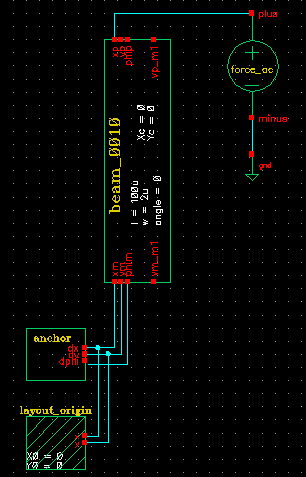
2. Now that we have a beam in the schematic window, let's put an anchor. Click on the instance icon to add a new instance. Specify Library, Cell, View, and properties as show below.
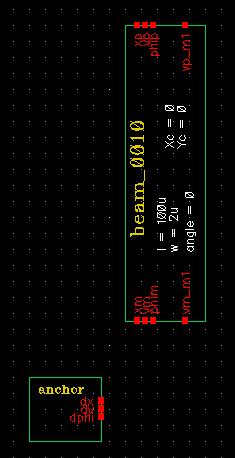
Place the anchor properly, your schematic window should now look like this.
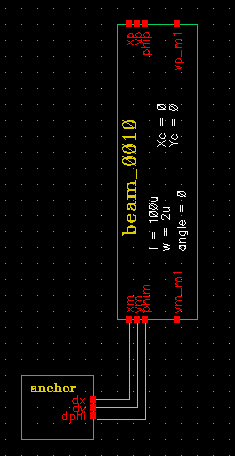
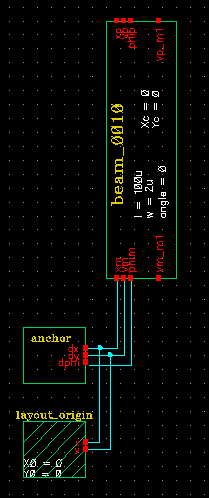
3. Next click on the Wire icon. Click once on the dx pin of the anchor, then click once on the xm pin of the beam. You should see a wire is connecting to two pins. Do the same with dy-ym and dphi-phim. Your schematic should now look like this.
4. Press the Esc key to escape wire mode. Now you should be able to figure out by yourself how to put in the layout_origin, and how to connect it. Once you finish this your schematic should look like this.
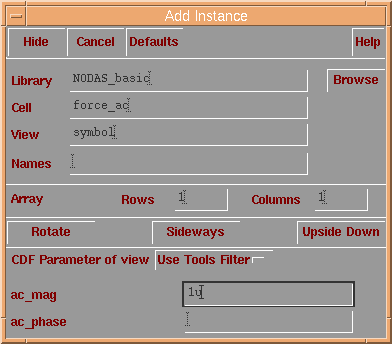
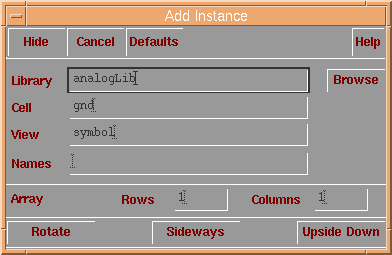
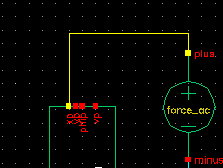
5. In order to simulate resonating frequency, we need to add an ac force source and a gnd. Note force_ac is from the NODAS_basic library, and gnd is from the analogLib library.
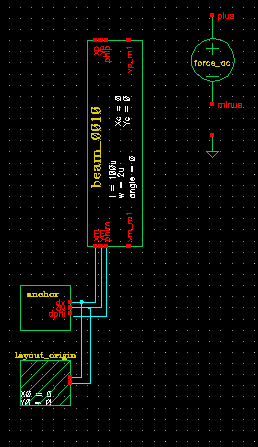
6. Place these instances in your schematic like the picture below.
7. Wire the instances properly wire and your schematic is finished. The final should schematic look like this:
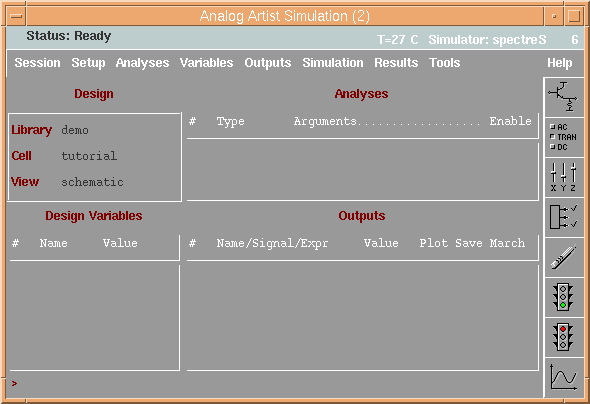
Part III. Simulation
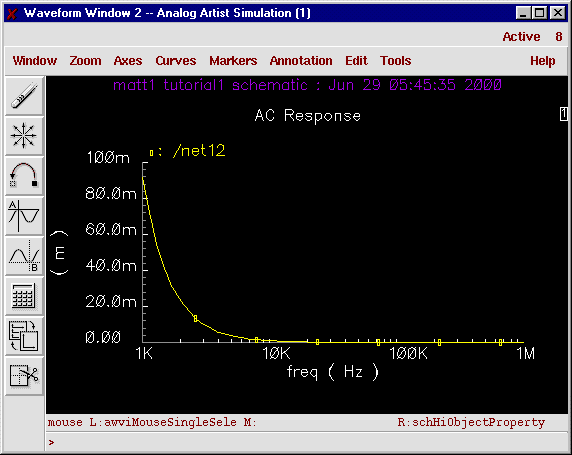
The net becomes high-lighted in a color (in the case yellow).
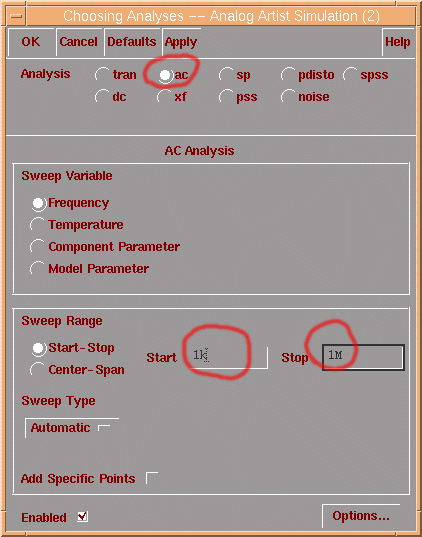
Select ac, and set frequency range as above. Then click Ok.
You can see the resonating frequency is around 300k.
Part III. Layout Generation Now That we've
done all the hard work, layout generation is just a few click away. First, in the
schematic
window, press F6. Notice there is a new menu item Mems Utility that appears on the
top menu bar. Next. Click Mems Utility. You will see two sub menu-items. 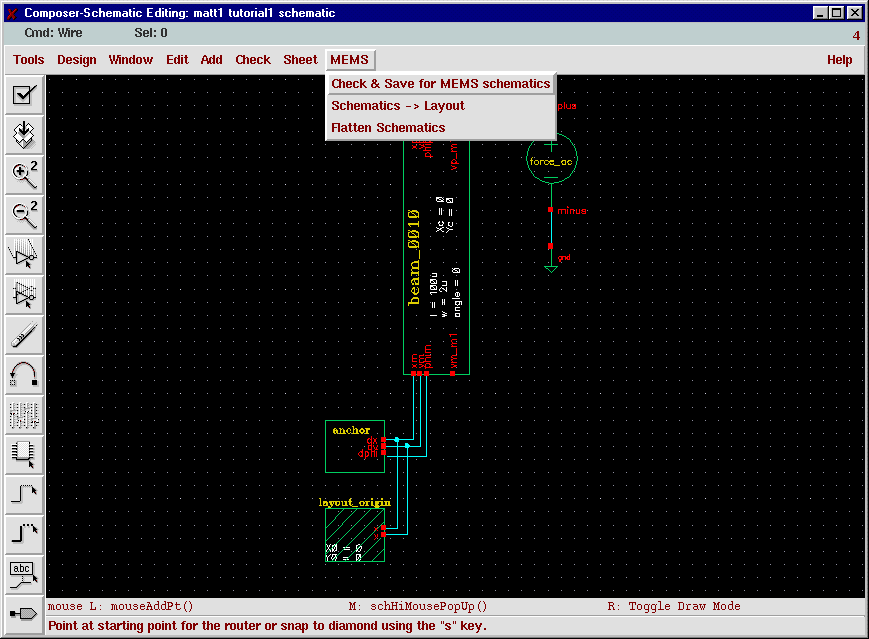
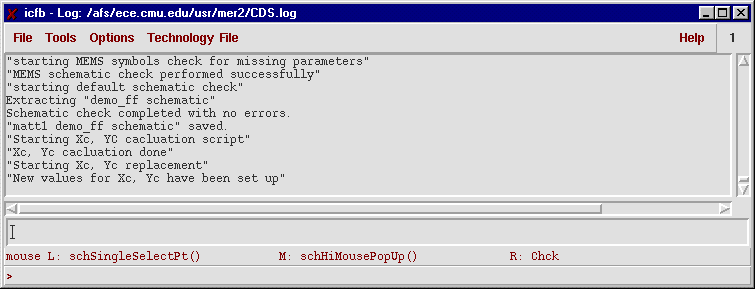
3. Click on Check & Save for MEMS Schematics. In the CIW window you should see that there were no errors and that new values have been set for Xc and Yc.
5. Click on Schematics => Layout in the MEMS menu. You will see the layout pop up in a seperate window!
Note: What you see in layout is the top-level cells. If you want to see the detailed layers press Shift-F. To switch back from the layer view to top-level cell view press Ctrl-F.
Part IV. Play more with the schematic. Now go back to the schematic and try to change the properties of the beam or anchor. See how the layout will generate according to your specification. Then try to play with more complex instances like putting a plate in your schematic. Then try to put in a comb_1 and comb_2. Enjoy! If you are ready to try building some real useful application and learn how to simulate, go to How to build a folded flexure resonator .
Created 03/09/00 by Kai He at khe@ece.cmu.edu