


Base
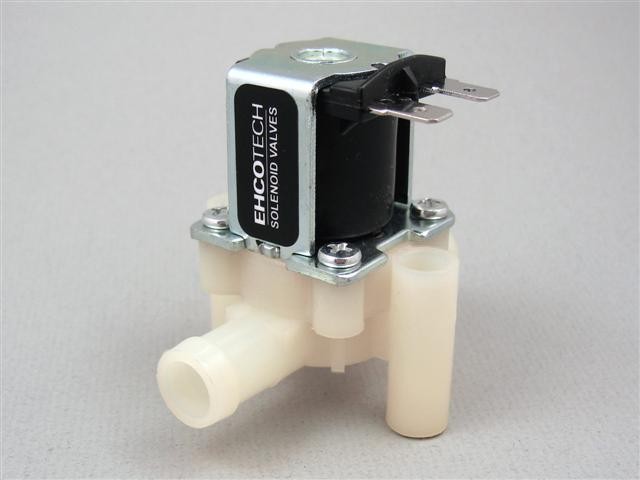
Solenoid Valve |
To fulfill our requirements we will obviously need some sort of mechanism to dispense water from an elevated position. This mechanism must be electronically activated for the sake of embedded design and for convenience. Initial research resulted in the conclusion that this mechanism must be some sort of solenoid valve. It is worthy to note that the first Graphical Waterfall to be invented implemented solenoid valves. To maintain a legible resolution, we would like to have at least 20 solenoid valves. |
Water Pump |
To get the water being collected at the base of our system to the elevated valves we'll need some sort of water pump. This pump will be connected to some sort of pressurized pipe that will also house our valve array. In order to prevent some sort of explosion, we will also need some sort of relief valve to vent excess water and to decrease unwanted pressure. |
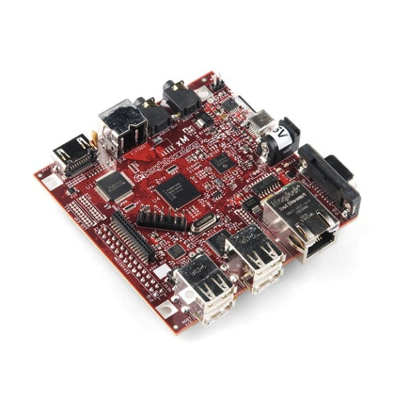
BeagleBoardXM |
To control the valve array we will obviously need some sort of microcontroller or microprocessor. If our computer has enough I/O pins to accommodate every individual valve, then we may choose to dedicate exactly one I/O pin to each valve. If we do not have that many I/O pins, then we would need to get shift registers capable of accepting serial input and having parallel output. |

USB Adapter |
In order to implement Wifi in our system without having to resort to PC or laptop usage, we will most likely need a microprocessor capable supporting a UNIX operating system. To write and test smart phone applications we will most likely need a smart phone or two. Fortunately, most of our group members already have smart phones so this won't be an issue. |
In order to have the valve array elevated in the first place, we will need some sort of standing structure. This structure can be as simple as two wooden poles for all we care at the moment.
As for the issue of power, we need something will supply voltages that our computer can handle (< 10V, definitely). We will also need something that will be able to supply comparatively high voltages (12V-36V) to many devices (10-50, who knows?). To get that much power, we will obviously need a wall outlet. As for the actual power supply, perhaps we can use an old PC power supply. This needs to be researched. Speaking of power, we will need a MOSFET and perhaps a capacitor and a few diodes to control each valve safely.
For the sake of making our water images more easily visible to the naked eye, we should also invest in a simple black cloth to serve as a backdrop for our system. Lastly, to catch the water that we drop we will need some sort of container. A simple plastic tub would suffice.
Architecture section contains the appearance of our whole system.
Optional
For our final demo we would like our booth to be as cool and eye-catching as possible. However, simply getting our system to function properly takes utmost priority. After we are comfortable with our system and we feel that we have met all of our requirements, then we can begin to implement all sorts of eye-candy.
One simple idea to make our display more attractive is to add an array of RGB LED's in line with our valve array so that our water images can be illuminated with a variety of different colors.
Another idea is to add some sort of fluorescent dye (e.g. highlighter fluid) to the water and attach a long black light to our valve array. The anticipated effect of this setup is to have glowing water images. For this to work to its full potential, we may have to build some sort of an enclosure around our system to remove as much ambient light as we can.
Yet another idea is to create some sort of touchpad application that will allow users to draw lines with their fingers in real time. If we have extra time on our hands, we will also strive to make our team website as interesting and unique as possible in order to impress those who happen to stumble upon it.